SOLD! Please email me at JamieWG@aol.com to inquire about a similar painting.
6 x 6″, Oils on sealed, primed hardboard, unframed
Tilly Foster Farm is an old horse farm that was purchased a few years ago by Putnam County to retain as open space. It has beautiful rolling fields, old buildings and barns, and a fantastic overview of miles and miles from the top of the pastures. This painting was done from a photo I took there in the fall.
Making a Multi-Media Sketchbook
I’ve made a number of sketchbooks over the years and have recently been asked to share some of them. This is perhaps the easiest, most useful, and most versatile of them all. The biggest advantages to this design are that many different kinds of paper can be used for various media and effects, plus the paper can be removed easily for framing.
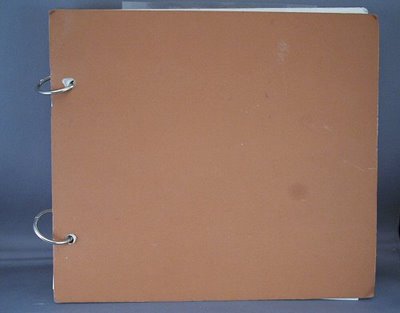
Use any kind of cardboard, foamcore, illustration board, or matboard for your covers. I used scrap pieces of matboard that I had around the house and cut two pieces to the same size. Purchase some ringbinder rings in an office supply store. I got mine at Staples (very inexpensive). Holes were punched in the matboard for the rings:

Next, cut various types of paper that you like to use for painting, drawing, and sketching. Be sure to cut the paper about 1/2 inch smaller than the matboard. When in use, you’ll be doubling over the matboard to serve as a firm drawing board. The matboard edges also serve to protect the edges and corners of the paper. Punch holes in the paper, making sure they line up with the holes you’ve punched in the covers. You can paint your cover to decorate your sketchbook, but I just left mine blank.
If you use a lot of wet media, consider a piece of foamcore for one or both covers, coated with a couple of coats of acrylic medium, to use as a painting board. You can even tape paper down to it that way after removing a sheet from the book, or use metal office clips to hold it. Oil pastel and soft pastel artists can include sheets of glassine with holes punched, to place between finished drawings.
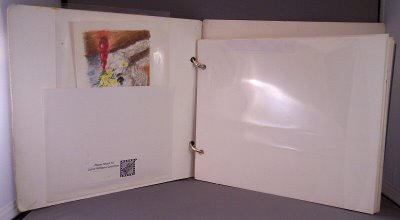
Glue a pocket to the inside of the front cover. (See image below.) I used this to hold templates for standard sizes. If you have, for instance, a 5×7″ template in the pocket, you can pull it out to draw a quick 5×7 rectangle on a piece of the paper. Then you’ll have a drawing or painting that will fit perfectly into a ready-made mat and frame. The little pocket also comes in handy for photo references, drawings, a ruler, etc. I put a sticker on the inside of the cover saying “If found please return to” with my name, address and phone number.
You can click on the image below to enlarge it:

On the right side, the shiny plastic is a sheet of clear acetate. When working in colored pencil or graphite, I’d keep this under my hand to stop the pencil from smudging. I kept another sheet of it in the little pocket inside the cover. You can also keep glassine in the book, or whatever else you use to protect your finished work.
I hope this helps some of you who want a sketchbook that can do it all!

I love your sketchbook idea, I have all these samples of paper that I was stewing about how to organise them all.
The windmill and sailboat paintings are super!
Left by Lori on January 8th, 2007