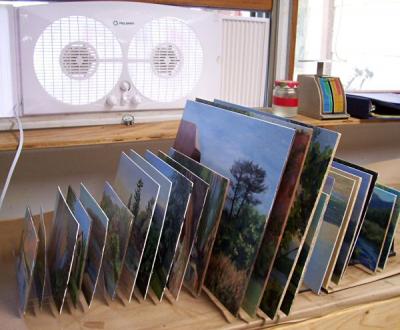
I have 22 freshly varnished oil and acrylic paintings in these drying racks. Over the past several days they’ve been getting isolation coats and varnish coats. Many artists who paint in both mediums have asked me for information on my varnishing process, so I thought I’d take some time today to describe my process.
There are several different products that can be used to obtain a variety of finishes depending on personal artistic preferences. I love gloss varnish. It pops the colors and values and gives a shiny, professional appearance. I have chosen products to yield that result. There are many other good products on the marketplace too.
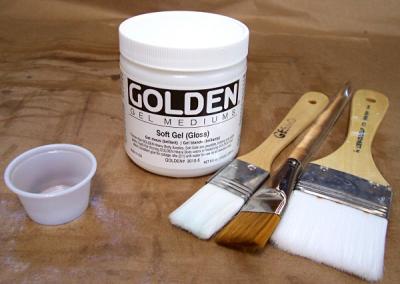
I start with Golden Soft Gel (Gloss) and relatively soft, synthetic brushes to do an isolation coat on the acrylic paintings. Oil paintings do not require this step. I use the small container shown above to measure. The Gel gets diluted two parts Gel to one of water. I mix it up thoroughly in a styrofoam bowl.
I clean off the painting surface with a lint free rag to be sure there are no dust particles on the surface. Then each dry acrylic painting gets a thin coating, following the direction of the brushstrokes. One coat is generally enough to seal a relatively non-porous surface, such as my sealed, primed hardboards. Rag paper and matboard, even if sized before painting, generally requires 2-3 thin coats. You can tell when you’ve put on enough coats because the surface develops a soft sheen.
Many acrylic painters make the mistake of eliminating the isolation coat. That results in too much varnish penetrating through the surface of the support, and can cloud your painting. Also, it will leave an uneven finish. Putting on enough isolation coats to prevent penetration of the varnish yields a beautifully even gloss. It is well worth the additional steps! The second isolation coat can be applied several hours after the first if necessary. Be sure the first coat is dry, and not tacky.
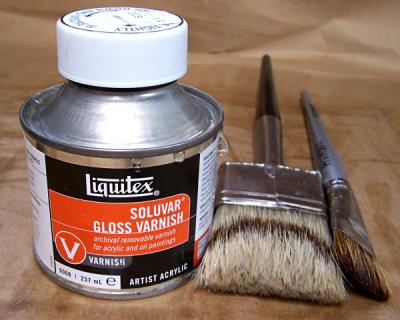
I like the Soluvar Gloss Varnish a lot for both oil and acrylic paintings. Be sure your oil paintings are completely dry before varnishing. That will generally take 6-12 months. Acrylic paintings can be varnished as soon as the isolation coat has cured. In dry, room temperature conditions, that should only take a few days.
Soluvar varnish is removable for cleaning, non-yellowing, and gives a great sheen. I used to use Gamvar, but found I had some adhesion problems on sections of some of my oil paintings, and the varnish would bead up as it was applied. I have not had that problem with Soluvar. I use the large, natural hair brush above for paintings 12×16 and larger, and the smaller natural/synthetic blend brush for smaller works. You need to work quickly with varnish before it dries.
I pour a small amount into a ceramic pot that I reserve for varnishing. I dip the bottom section of the brush in and wipe some off on the side of the pot. Varnish your painting section by section, overlapping sections as you go. I lie them face up once done until they are tacky. Although varnish should be applied too thin to drip, I always take that precaution. It’s better to be safe than sorry!
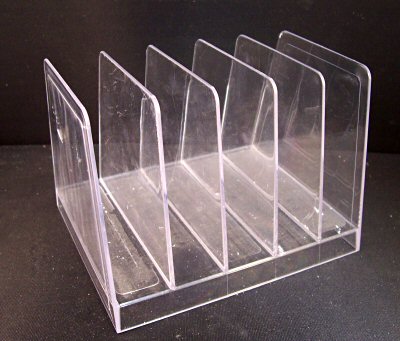
I got inexpensive, small letter holders (above) at Staples, and each can hold five paintings upright. They are only a couple of dollars each, and about 4″ tall. I bought them a couple at a time as I needed more and more of them. Once the paintings have tacked up, I set them in the letter holders. The first photo in this post shows what the paintings look like when they are set into a series of these letter holders.
You can also see on that first image, that a fan above the paintings draws the solvent fumes out of the room while I work. I have another fan on the other side of the room, by an open door to the garage, that helps push air across the room and out. That way, my paintings will dry faster and I can simultaneously vent the fumes out of my work space.
Once the paintings are varnished, I give them a couple of days to dry fully (in dry weather) before framing them. I hope this little demo helps some of you who have been struggling with varnishing. If you’ve been avoiding it, you’ll find it’s a lot easier than you thought, and the result is well worth the little bit of time and effort. Your paintings will glow with a new life!
You can read more about varnish application techniques in this article on the Golden website.


Hi Jamie,
Thanks for the post. I’m curious about your rack, was that made for you? I can’t tell how the paintings are being held. Can you provide a little more info? Thanks!
Left by Lori on September 3rd, 2008