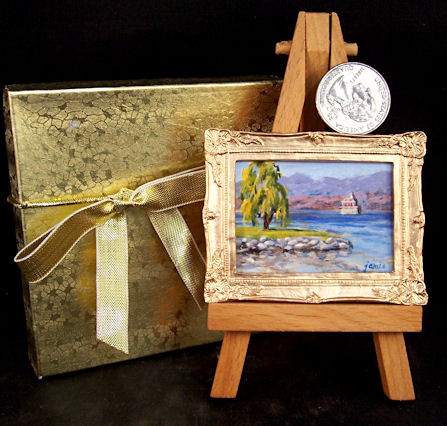
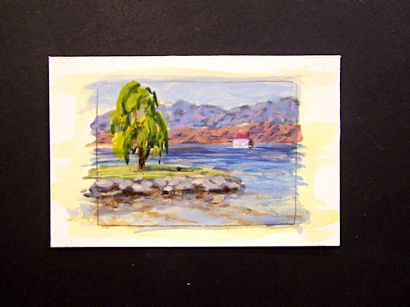
1.5×2″, Golden Acrylics on 4-ply Rag Bristol, framed
SOLD! Please email me at JamieWG@aol.com to inquire about a similar painting.
These miniature gems are too much fun to be legal! This is a miniature version of an 8×10″ painting that I did en plein air in the spring. You can see that painting by clicking here. I enjoy doing different size versions of the same scene. It gives me a chance to play with the composition and colors and try to turn out something even better each time. In this case, I shortened the peninsula so that the eye has a path around it to travel to the lighthouse.
My miniature paintings come with a gift box and buyer’s choice of either a little table easel, or a golden thread affixed to the back and a tack for hanging salon style.
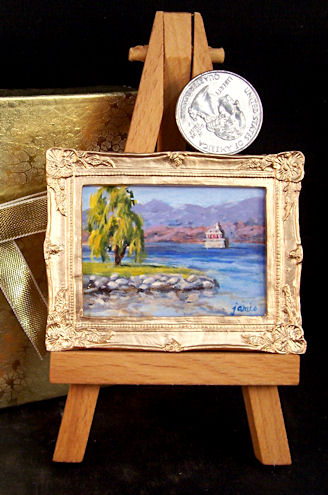
Here’s a slightly larger, cropped photo so that you can see the painting better. I wish this camera had a better lens so you could really see all the teeny tiny brushstrokes in there!
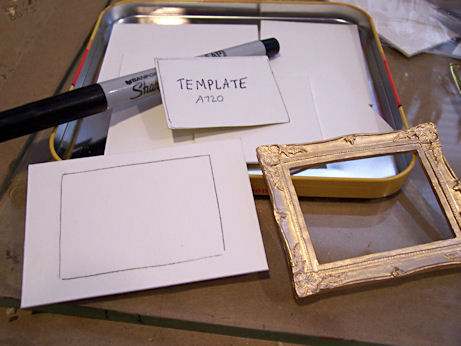
So much goes into doing one of these miniatures. They take me longer than paintings many times the size. The first step in the process is to cut the support for the painting. In this case, I used four-ply Strathmore rag bristol. It’s a very expensive support, but at this size I could probably get 100 paintings from a sheet! I size that with Golden Matte Medium, because I love the way acrylic paint takes to that sized surface.
Using a template previously cut to size for that frame, I place it on the new support and draw the rectangle around it. When I finish the painting, I’ll cut to the lines and will have a painting that will fit perfectly into the tiny frame.
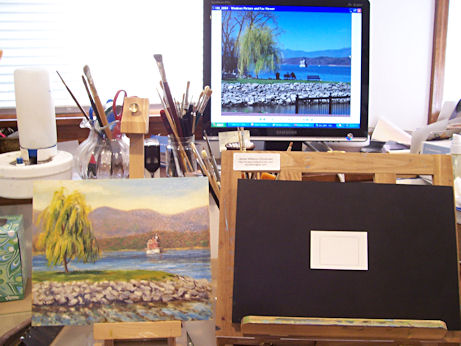
I put a tiny dot of blue-tack on the back of each corner, and affix my support to a piece of black foamcore that has also been sized with matte medium. The black helps reduce glare as I work, and makes it easier to support the tiny painting.
I set up my painting reference next to my easel, and put a photo reference of the scene up on the computer. I can zoom in and out of the photo reference to help me with the details, while using the color from my plein air piece.
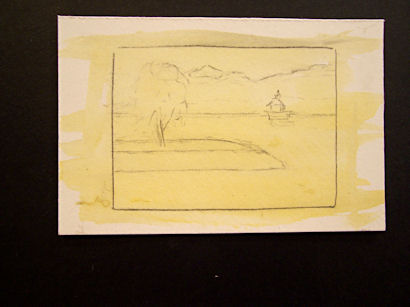
I sketched in my composition with just a few pencil lines, the coated the whole surface with Transparent Yellow Iron Oxide. That served the dual purpose of sealing the drawing and killing the white of the support.
This is as far as I was able to get without magnification! I have a goose neck lamp with a flourescent bulb and a built-in magnifying glass. I brought that over and worked a couple more hours to finish off the painting. The painting was then cut with an Xacto knife to fit in the frame.
For the sake of the photo of the finished painting, I put it into the frame temporarily. It will actually have to come out to be sealed and then varnished in a week or so. Once that is dry, it will be glued into the frame, and a backing put on that will cover the painting and frame from behind, so it will look like it came straight out of a high end frame shop!
Hopefully you now have an idea of what goes into turning out one of these little gems. They make great gift items.
