• If you'd like to receive my new posts and paintings in your email, please enter your email address:

    Delivered by FeedBurner


    Subscribe in a reader

    All images are Copyright Protected and the property of Jamie Williams Grossman. Paintings and photos displayed on this site may not be reprinted, copied, downloaded, displayed elsewhere, or used for any reason without her written permission.

    ------------------------------------- CUSTOMER REVIEWS

    "OMGGGGG, Jamie!!!! It's absolutely amazinggggggg!!!!!! I loveeeeee it!!!!!! This is sooo much more than I could have imagined!!! Thank you!!!!"

    "It's spectacular, Jamie!!! How talented you are! We absolutely love it! And you are right-the frame is just perfect for it! "

    "Happy" with it is an understatement! My sister's husband said, "Wow, it's beautiful!" That's a lot of emotion coming from him! haha. And my adult daughter said, "OMG MOM, ITS GORGEOUS!". You have added to your fan club!

    "Jamie, your painting arrived in perfect condition! And, as I expected, it looks even better ‘in person’ than on the computer screen. Thank you so much for your careful packing and wonderful painting."

    "...Today I finally surprised [my wife] with the actual painting! It is her birthday! And I just wanted to let you know the we both absolutely love it!! She was so so surprised, and just speechless.... Thank you again for being so flexible and good to work with! It was such a joy preparing for today and I appreciated your professionalism throughout the process!"

    "I love the new painting! It's actually a little more golden and fluid than it looks in the pic and I love the movement; everything in my house is a little on the warm and yellow and gold side so it could hang pretty much anywhere. It's going to the framer shortly and I look forward to having it up :-)"

    "Jamie, it's lovely!!! Thank you so much for all the time and love you've put into it! You have no idea how much joy your work is bringing to me. I'm very grateful!"

    "I just wanted to share that my father-in-law absolutely LOVES your painting. He loves the frame and said that he's never owned a real oil painting. ???? But most importantly, he loves the subject matter and he and my husband spent a lot of time reminiscing this morning about hikes they took there years ago. This part of the Hudson is, by far, their favorite! Thank you SO much for making this Christmas gift PERFECT."

    "Your paintings of my beloved Hudson Valley are stunning! I've always loved Hudson River paintings, and can't believe that I've found someone who is following in the great tradition of Cropsey and company! "

    "We received your painting yesterday and it's really very beautiful. Thank you again very much."

    "Your beautiful "Autumn at Rockwood" arrived in perfect condition two days ago. It is even more lovely in person than I ever could have imagined. Thank you so much for your artistry and your many kindnesses to me..... I will treasure both of my paintings very much ..."

    "I'm more than happy, I'm thrilled!"

    "I just wanted to let you know that I received [the painting] today! It is beautiful, thank you so much:)"

    "Your [miniature] Caillebotte arrived today. Wow, it's WAY better seeing it in person than viewing an image/photo of it. Spectacular..... Thank you so much!!"

    "It's beautiful. Thank you so much!"

    "Oh, Jamie! It is fabulous!!!!!!! I love it!"

    "Hi Jamie, I received painting yesterday. It's really beautiful! Thank you for sending so quickly. I'm sure it will give my friend hope and strengthen as she faces this battle with Parkinson's. Thank you!"

    "Jamie, My painting arrived Thursday and I love it. I will definitely order from you again."

    "[They] love the painting. They were so surprised. They really appreciate it and the thought and artistry behind it. They received many [wedding] gifts, and said this was one of their two favorites."

    "[My husband] loved loved loved the painting! It is hanging on the wall in my great room. It's just beautiful!"

    "Hi Jamie! The beautiful paintings arrived safe and sound this afternoon. I love them! (Boy you don't mess around with packing them ;) Thank you."

    "Hi Jamie –I thought you’d enjoy seeing “The Red Barge” framed. Until I give it to my husband on his birthday, I have it hanging in my office. I LOVE looking at it all day!"

    "I received the painting this morning. It is SO FANTASTIC!!!!!! I wish I would have had it done larger. Thank you! thank you!"

    "The East from Hunter Mountain painting arrived the other day. It made it through the snow and looks great. Thanks for everything."

    "Jamie, my wife and I love it. Thank you and great work. It was difficult trying to figure out a special gift for them......I'm very happy that I reached out to you. I know they will love the painting and the special touch you did with the card! "

    "Wow, it looks AMAZING! They are going to love it. I love the name too. Perfect. ... Thanks again!"

    "Your lovely painting of a sweet bird, framed beautifully, arrived last week.... I just adore it!!... I see it and injoy its beauty every day! Thank you so much!"

    "The painting is beautiful! I love it! "

    "Just a quick note to let you know your [miniature] Monet arrived in perfect condition. It looks fabulous!!! Thank you again so much."


    ------------------------------------------ If you haven't seen the two-DVD set, "The Impressionists", you don't know what you're missing!
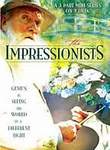
    the-impressionists.jpg


    I rented it from Netflix and absolutely loved it. It is an enactment of the lives of Monet, Renoir, Manet, Cezanne, Degas, and other Impressionist painters living at that time around Paris. Fascinating and eye-opening!

Archive for the 'How to Make Paint' Category

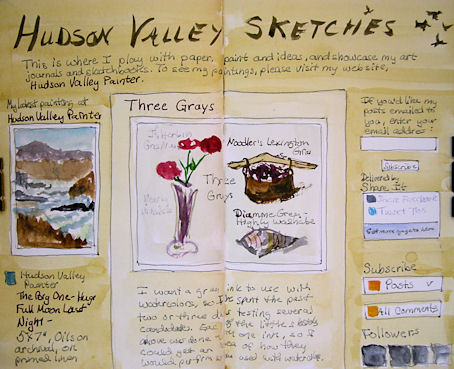
It’s Official — I have a new blog for my sketches!

Posted by Jamie on March 24th, 2011
110324-FV-hudsonvalleysketches-450

I did this little 9×12″ watercolor across a two-page spread in my Fabriano Venezia sketchbook to show you what my new blog looks like! If you’ve enjoyed seeing my sketches, hearing my rambles about the artistic process, and looking on while I varnished paintings, primed panels, mixed paint, and built foamcore pochade boxes, most of those things will be posted only on the new “Sketches” blog from now on. That blog is at http://HudsonValleySketches.blogspot.com. You can click here to head over there now, and subscribe there to continue to receive all my posts online.

Don’t worry; this This Hudson Valley Painter blog isn’t going away! It will still be here, and will contain my completed paintings that are available for sale. The sketches, product reviews, and thoughts on the artistic process will be on the new site.

How to Tube Paint — Demo

Posted by Jamie on November 8th, 2009

Since my post about tubing my own paint, I’ve received many requests for instructions from viewers. Hopefully this demo will answer most of your questions. Many thanks to Marc Hanson for his paint-tubing advice as I got started with doing my own.

There are many reasons for tubing your own paint:
Mix leftover paints when a session is done and save it as a neutral “mud mix” for future paintings;
Make your own paints out of binders and pigments;
Mix various values of grays and tube them;
Premix favorite color mixes;
Purchase quality paints that come in jars, like RGH brand, then tube them yourself;
Buy your favorite paints in very large tubes, and transfer to smaller tubes for travel/plein air work.

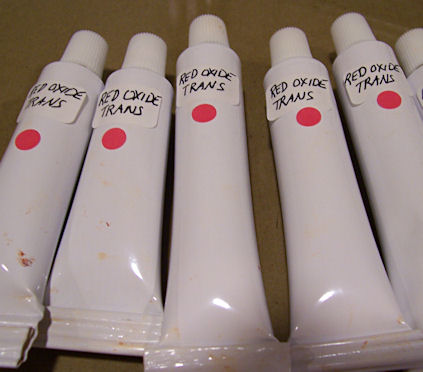
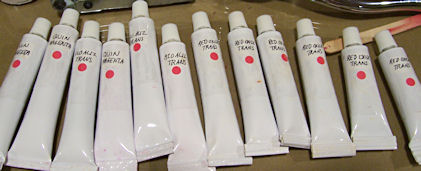
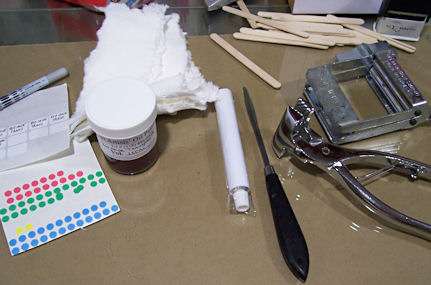
I made up a dozen tubes yesterday of various reds, taking photos along the way to show you how to do it. Most artists will find that they already have most of what they need, except perhaps the tubes themselves! Those can be ordered from online sources such as Dick Blick, Jerrys Artarama, and ASW.

tubing-paint-1-materials-425

Supplies I use are:
Paint tubes (of course!)
Long, straight palette knife. (Width depends on your tube size.)
Pre-cut strips of paper towel
Rubber gloves
Wooden craft sticks
Tube wringer
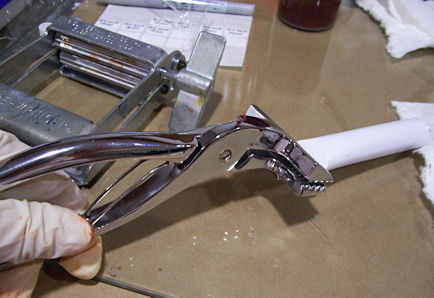
Canvas pliers
Sharpie marker/marking pen
Packing tape
Little colored dots (optional, but really handy)

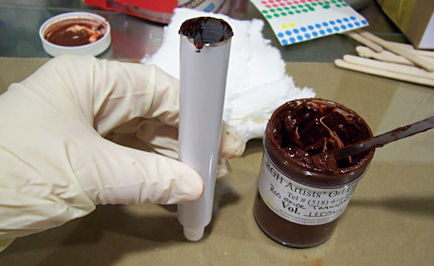
tubing-paint-2-filling-425

Put on your disposable gloves. Holding the open end of the tube upright, transfer paint into the tube with the palette knife. Place it as far down into the tube as you can. Tap several times as you transfer, so that the paint settles down in the tube and you don’t get air down there. Try to keep the sides of the tube free of paint. When you get 1.5-2″ from the top, scrape out around the side of the tube above the paint level to remove as much paint as possible.

tubing-paint-3-flatten-end-425

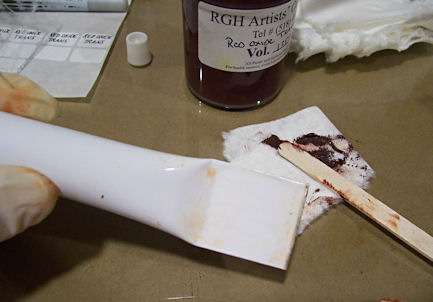
Squeeze the end flat with your fingers, making sure you get out all the air. Use a wooden craft stick on a small piece of paper towel to press out as much paint as you can that remains in the flattened section of the tube.

tubing-paint-4-wringer-425

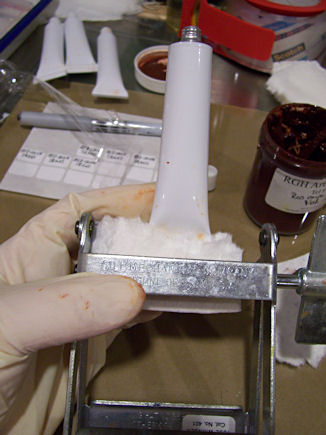
Next you’ll use the tube wringer to crimp that end and prevent paint from escaping. I find that by folding a few thicknesses of paper towel over the tube end first, I can avoid a lot of mess on my tube wringer! That saves me a lot of cleaning time too. If you do happen to get a lot of paint on it, just fold a piece of paper towel and wring it through a few times to remove the paint.

tubing-paint-5-canvas-pliers-425

Fold the tube end tightly with your fingers, crimping it with the canvas pliers as you go.

tubing-paint-6-label-425

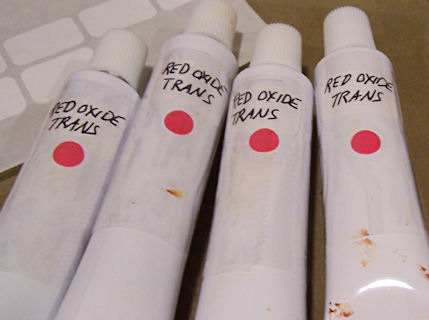
I like to use these little labels on the tubes that I can prepare in advance, but if you prefer, you can just write the color directly on the tube with a sharpie. The little colored dots make it easy for me to recognize color family when sorting quickly through a bunch of tubes in my box. I put a small dot on the back side of the tube as well.

tubing-paint-7-packing-tape-425

Surround the label and dots with clear packing tape. That will prevent the name from coming off. If you’ve written the names directly on the tubes with a Sharpie, it will protect it from rubbing off.

tubing-paint-8-all-done-425

All done. It’s a cinch!

Making Oil Paint

Posted by Jamie on January 14th, 2009

1-gather-materials-400

I started making some of my own oil paint a few years ago when I was in search of a higher quality Ultramarine Blue. In using a limited palette at that time, I was dependent on the ultramarine for providing the basis for the dark side of my palette. I needed the deepest, darkest, most heavily-pigmented ultramarine I could find. The best solution to my problem was to make my own. I stay away from cadmiums and toxic pigments, and just buy those in the store. Some pigments mix up easier than others. Ultramarine is a cinch!

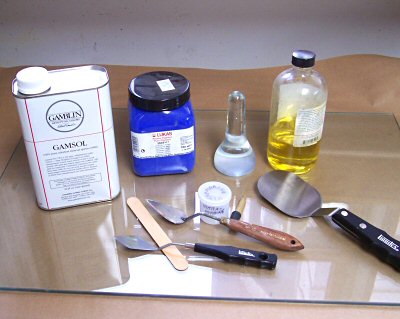
The photo above shows the materials I use for paintmaking. I made this batch of Ultramarine Deep today and took these photos as I went to show my process. Making paint is my version of playing in the sandbox.

2-pigment-pile-and-oil-4001

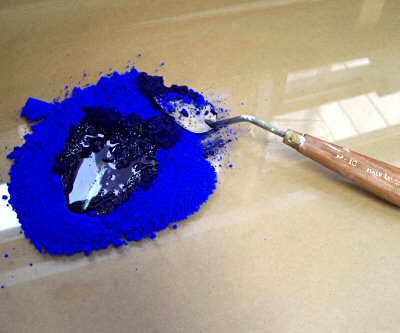
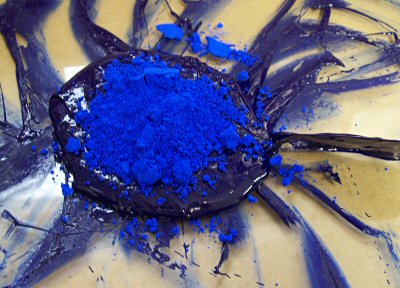
I begin with a nice big pile of pigment (above) on a 1/4″ glass slab, and make a crater in the center. I fill the crater with alkalai-refined linseed oil.

3-initial-dry-mixing-400

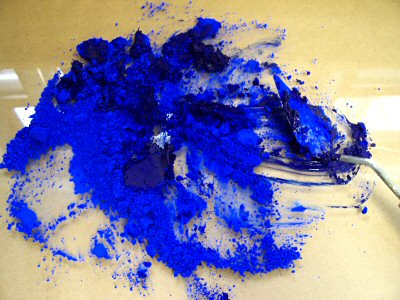
I work the oil into the dry pigment particles. I add more oil a little at a time as needed. I suppose I could do this more scientifically by taking careful measurements, but as in cooking, I prefer to adjust as needed rather than following a recipe. Now it’s time to take out the glass muller.

5-glass-muller-in-use-400

Contrary to what you might think, the paint becomes runnier as it is mulled. The glass muller crushes the clumps of pigment particles apart, so that the individual particles will be surrounded by the oil binder.

5-adding-more-pigment-again-400

Since the paint tends to liquify as the oil surrounds the individual pigment particles, you may find it gets too runny and you need to add more pigment. There is actually quite a fine line between too much and not enough.

6-too-dry-400

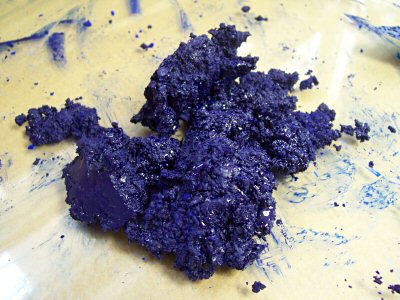
You may think you need quite a bit more pigment to increase the body of the paint, and then in a flash the entire mass becomes dry and unworkable. (above) A little more oil does the trick.

7-mulled-to-perfection-400

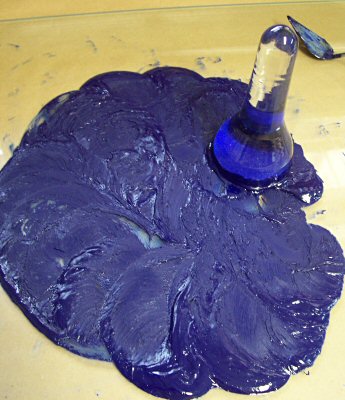
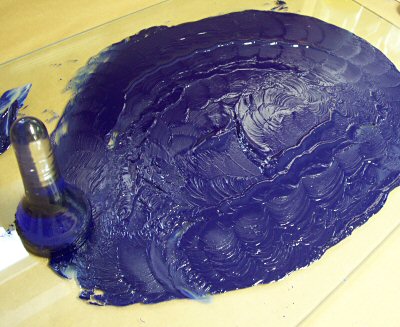
This is what I consider mulled to perfection. The pigment is well mulled into the oil. You can tell from the sheen that there is enough oil so that the paint won’t be underbound. If I add more pigment at this point, it will likely clump together again.

8-done-400

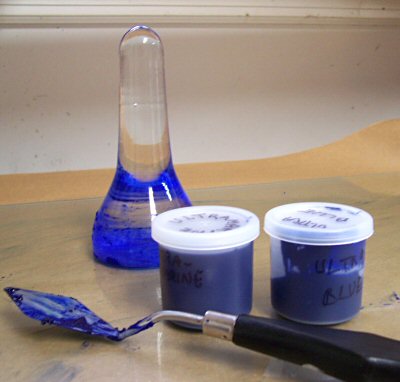
I’m done! I store these small containers of homemade paint in the freezer, and clean up the implements with mineral spirits or Windex. The paint containers will keep in the freezer indefinitely, as the cold slows the oxidation of the paint and the containers are airtight. I could put it into tubes if I preferred. Ultramarine pigment can get stringy when left sitting in oil, and since I don’t use wax or other additives in my paint to counteract that tendency, I find it keeps a better working consistency in the freezer.

Now it’s time to go paint!

Edit: I have removed the step of adding any mineral spirits at all, even in small amounts. I have done it both ways, and I think it is easier to gauge the proportions of oil and pigment without additional ingredients. Mineral spirits can result in underbinding of the paint, and it’s better not to take that risk.