• If you'd like to receive my new posts and paintings in your email, please enter your email address:

    Delivered by FeedBurner


    Subscribe in a reader

    All images are Copyright Protected and the property of Jamie Williams Grossman. Paintings and photos displayed on this site may not be reprinted, copied, downloaded, displayed elsewhere, or used for any reason without her written permission.

    ------------------------------------- CUSTOMER REVIEWS

    "OMGGGGG, Jamie!!!! It's absolutely amazinggggggg!!!!!! I loveeeeee it!!!!!! This is sooo much more than I could have imagined!!! Thank you!!!!"

    "It's spectacular, Jamie!!! How talented you are! We absolutely love it! And you are right-the frame is just perfect for it! "

    "Happy" with it is an understatement! My sister's husband said, "Wow, it's beautiful!" That's a lot of emotion coming from him! haha. And my adult daughter said, "OMG MOM, ITS GORGEOUS!". You have added to your fan club!

    "Jamie, your painting arrived in perfect condition! And, as I expected, it looks even better ‘in person’ than on the computer screen. Thank you so much for your careful packing and wonderful painting."

    "...Today I finally surprised [my wife] with the actual painting! It is her birthday! And I just wanted to let you know the we both absolutely love it!! She was so so surprised, and just speechless.... Thank you again for being so flexible and good to work with! It was such a joy preparing for today and I appreciated your professionalism throughout the process!"

    "I love the new painting! It's actually a little more golden and fluid than it looks in the pic and I love the movement; everything in my house is a little on the warm and yellow and gold side so it could hang pretty much anywhere. It's going to the framer shortly and I look forward to having it up :-)"

    "Jamie, it's lovely!!! Thank you so much for all the time and love you've put into it! You have no idea how much joy your work is bringing to me. I'm very grateful!"

    "I just wanted to share that my father-in-law absolutely LOVES your painting. He loves the frame and said that he's never owned a real oil painting. ???? But most importantly, he loves the subject matter and he and my husband spent a lot of time reminiscing this morning about hikes they took there years ago. This part of the Hudson is, by far, their favorite! Thank you SO much for making this Christmas gift PERFECT."

    "Your paintings of my beloved Hudson Valley are stunning! I've always loved Hudson River paintings, and can't believe that I've found someone who is following in the great tradition of Cropsey and company! "

    "We received your painting yesterday and it's really very beautiful. Thank you again very much."

    "Your beautiful "Autumn at Rockwood" arrived in perfect condition two days ago. It is even more lovely in person than I ever could have imagined. Thank you so much for your artistry and your many kindnesses to me..... I will treasure both of my paintings very much ..."

    "I'm more than happy, I'm thrilled!"

    "I just wanted to let you know that I received [the painting] today! It is beautiful, thank you so much:)"

    "Your [miniature] Caillebotte arrived today. Wow, it's WAY better seeing it in person than viewing an image/photo of it. Spectacular..... Thank you so much!!"

    "It's beautiful. Thank you so much!"

    "Oh, Jamie! It is fabulous!!!!!!! I love it!"

    "Hi Jamie, I received painting yesterday. It's really beautiful! Thank you for sending so quickly. I'm sure it will give my friend hope and strengthen as she faces this battle with Parkinson's. Thank you!"

    "Jamie, My painting arrived Thursday and I love it. I will definitely order from you again."

    "[They] love the painting. They were so surprised. They really appreciate it and the thought and artistry behind it. They received many [wedding] gifts, and said this was one of their two favorites."

    "[My husband] loved loved loved the painting! It is hanging on the wall in my great room. It's just beautiful!"

    "Hi Jamie! The beautiful paintings arrived safe and sound this afternoon. I love them! (Boy you don't mess around with packing them ;) Thank you."

    "Hi Jamie –I thought you’d enjoy seeing “The Red Barge” framed. Until I give it to my husband on his birthday, I have it hanging in my office. I LOVE looking at it all day!"

    "I received the painting this morning. It is SO FANTASTIC!!!!!! I wish I would have had it done larger. Thank you! thank you!"

    "The East from Hunter Mountain painting arrived the other day. It made it through the snow and looks great. Thanks for everything."

    "Jamie, my wife and I love it. Thank you and great work. It was difficult trying to figure out a special gift for them......I'm very happy that I reached out to you. I know they will love the painting and the special touch you did with the card! "

    "Wow, it looks AMAZING! They are going to love it. I love the name too. Perfect. ... Thanks again!"

    "Your lovely painting of a sweet bird, framed beautifully, arrived last week.... I just adore it!!... I see it and injoy its beauty every day! Thank you so much!"

    "The painting is beautiful! I love it! "

    "Just a quick note to let you know your [miniature] Monet arrived in perfect condition. It looks fabulous!!! Thank you again so much."


    ------------------------------------------ If you haven't seen the two-DVD set, "The Impressionists", you don't know what you're missing!

    the-impressionists.jpg


    I rented it from Netflix and absolutely loved it. It is an enactment of the lives of Monet, Renoir, Manet, Cezanne, Degas, and other Impressionist painters living at that time around Paris. Fascinating and eye-opening!


Archive for the 'Studio Tours' Category

Welcome to my new studio! Part 1

Posted by Jamie on September 5th, 2010

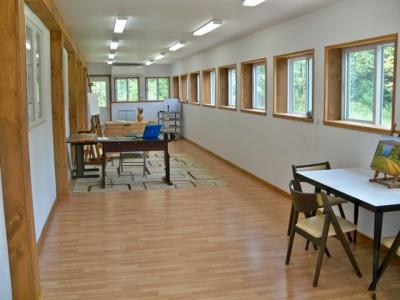
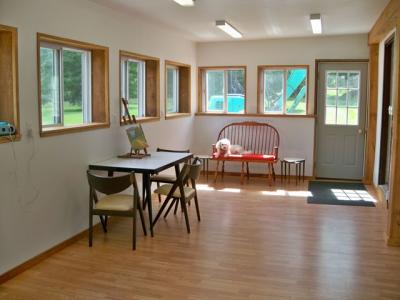
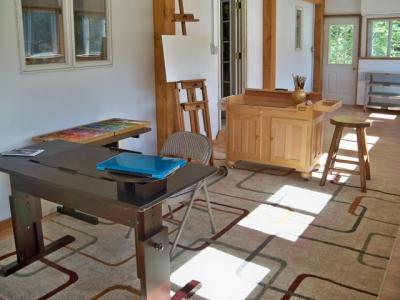
Part 1 of my new studio is finally finished (the painting room). I’m so excited about getting in there with paints and brushes and turning out some pieces worthy of the space. I’m sure I’ll be moving things around a lot as I settle in, but here are a few pics to show it in its finished state and the way it is currently set up. You can click to enlarge any of these images.

Studio-done-1-from-entrance

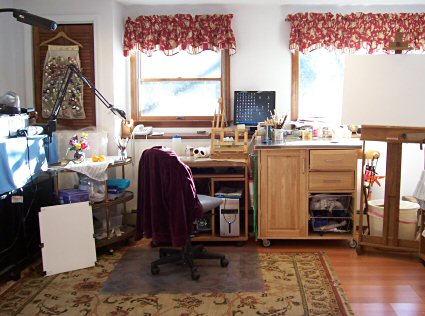
Above is the view when you first walk in. I set up my painting area in the center of the room. There is so much natural light that I really don’t need to use the ceiling lighting during the day, but I put it on for the photo. There are 12, two-bulb flourescent fixtures. I played a lot with different types/temperatures of bulbs and settled on a combination of 5000K and 4100K bulbs. These are the newer, thin bulbs. I was told that they come on faster and are more efficient. These fixtures don’t emit that annoying buzz at all, and as you can see, they pretty much disappear in the room and don’t call attention to themselves.

Studio-done-2-entryway

Here’s the entrance, looking back the other way toward the door. Of course, my mascot Rondo has to be a part of the activity. He has loved this bench since he was a puppy. The table on the left is an extra work table or a place to have a snack with friends, or a wine and cheese buffet at an open studio! I have room in this area for a model stand, should I ever decide I want one.

Studio-done-3-painting-area

Here’s a photo of the painting area. I took advantage of a fabulous studio furniture sale at Jerrys. It was very timely. But now I am having trouble with the thought of getting paint all over this brand new stuff!

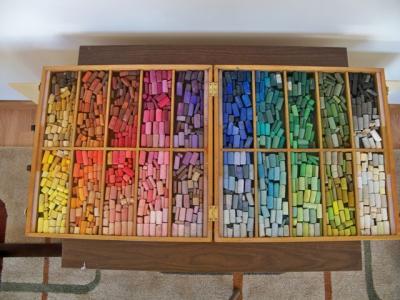
The wall to the back on the left side will have drying rails installed for works in progress and newly finished paintings. I think I should be able to get about 32 linear feet of rails on there for sizes 5×7 up to 18×24. Notice that I FINALLY have a space for my pastels! I can’t wait to dive into this box of jewels again!

Studio-Done-5-pastels

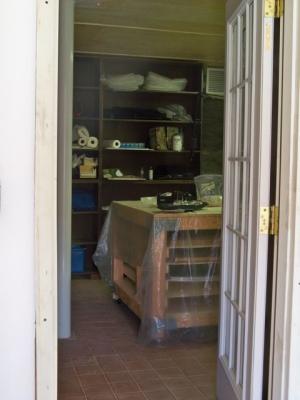
You may have seen that there’s not much here in the way of storage for panels, paints and other supplies. That’s because beyond that doorway to the left, there is a 13×16′ supply room with shelving all around and the 4×8′ workstation that my husband made for me. The contractors will be going in there this week to paint, upgrade the lighting, and install a slop sink. Here’s a peek into the other room:

Studio-done-4-framing-room

There will be more photos of that space to come in Part 2 when they finish with it. That’s where I’ll be priming panels, varnishing, framing, and storing most of my materials. The slop sink is going in that area because that’s where the messiest stuff will be done. Having this additional space will hopefully enable me to keep my painting room clutter-free. Of course, it will probably never be as clutter-free and clean as it is right now. Once I get in there with paint, all bets are off!

News from the Studio — storage and work station idea

Posted by Jamie on August 31st, 2010

Workstation-1

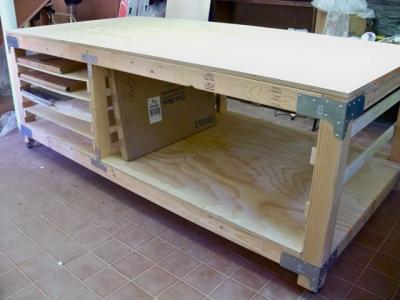
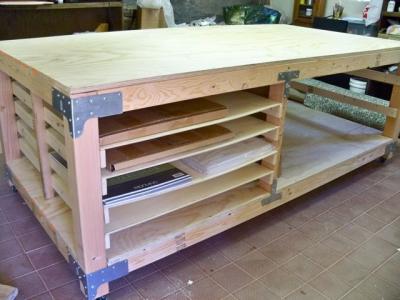
New studio update! My husband made me this awesome 4×8’x3′ tall workstation for the framing/supply room in my new studio. I am so thrilled with it. What a talented guy! It has 36×48″ slide-out shelves for storage of large paper, matboard, and foamcore. The shelves slide out from either side, so paper can be loaded/unloaded either way, and smaller pads/sheets put in from both ends.

On the other side is a large, open area for all those BIG things that I never have a spot for, such as larger panels, frames and frames and more frames, and assorted boxes of “stuff”.

The table is massive, but he put it on casters so it’s a breeze to push it around the space as needed. It still needs a couple more coats of polyurethane, and I’ll be putting a sheet of homasote on the top to protect frames, cut glass, and protect materials. When priming panels and varnishing paintings, I’ll just throw a tarp over it and I’ll be ready to go with a super large work surface.

Here’s another photo from the other side:

Workstation-2

Update on New Studio Construction

Posted by Jamie on July 30th, 2010

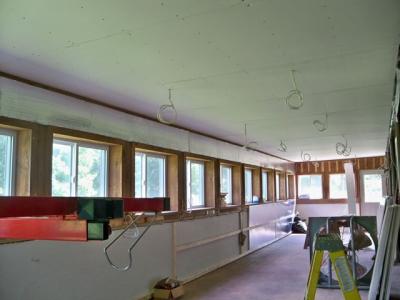
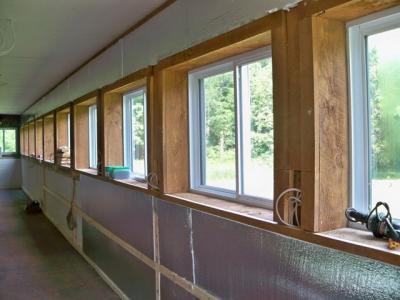
Things are moving along here with the construction of my new studio, and I think I can see there will be light at the end of the tunnel! The ceiling has been insulated, wired for lighting, and sheetrocked:

Studio-ceiling-wired-sheetrocked

Electric lines have been run to the far wall, and there will be outlets between every window:

Studio-Outlets-Wired

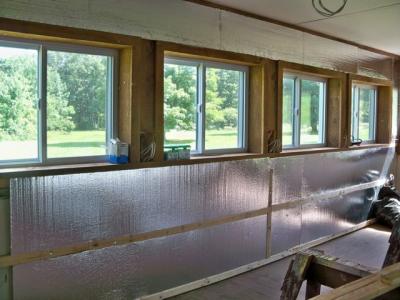
Wall insulation is underway too:

Studio-Wall-Insulation-underway

Tubing Paint

Posted by Jamie on October 12th, 2009

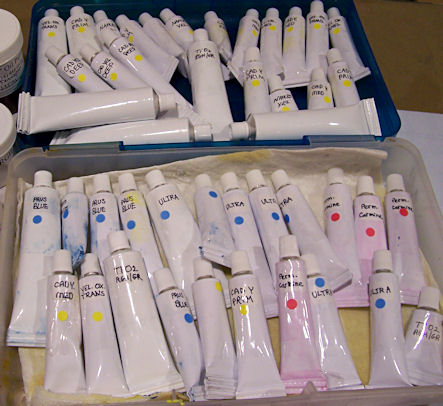
Tubing-Paint-450

Every so often it’s good for viewers to see into our studios at what goes on behind the scenes in addition to painting. For the past few days, I’ve been spending some time getting oil paints from jars into these tubes. Many thanks to my friend Mary and daughter Sarah, who lent a helping hand (or two!) while my right hand recovers from surgery.

Most of these tubes are small to fit easily into my pochade boxes and not add much weight. Usually I carry two tubes of white with me and mix my titanium white oil paint half and half with Griffin alkyd white to speed drying time. So, for the white tubes here, I mixed the two whites before tubing them. Now I’ll only have to carry one tube of white with me. (Actually, my “Studio Assistant” daughter measured, mixed and tubed most of the white.)

Nine jars of various colors down, three to go! That translates to about another 12-14 tubes of paint.

A new studio…sort of!

Posted by Jamie on July 13th, 2009

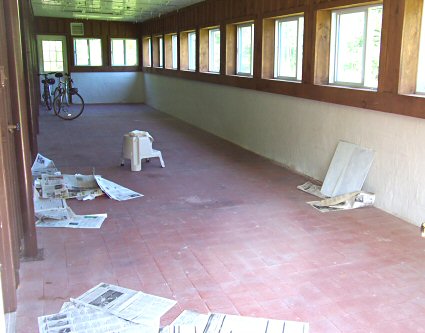
When I walk into my future studio in Palenville, I get discouraged by how much renovation work there is to do, and how long it’s going to take before I can get this space up and running. It’s got great potential, with 14 windows and two exterior doors, and about 600 square feet of working space.

future-studio-425

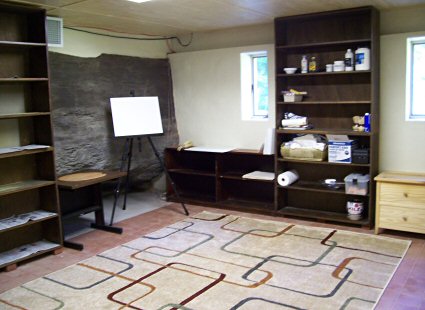
But what’s an artist to do on these rainy days without a working studio? My dear husband suggested I temporarily take a room in the basement, and set it up to use in the meantime. He took me out to buy a rug, and it has all these great built in shelves for my supplies.

temp-studio-1-425

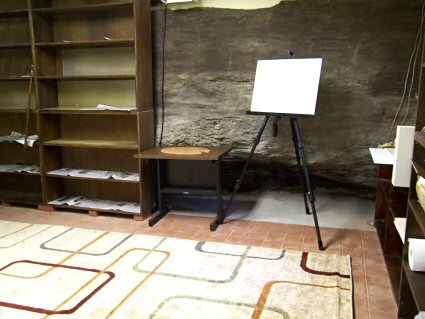
It even has South Mountain as one wall of the room! 😀

temp-studio-2-425

It may not be an ideal working space, but I am so happy to have a place upstate where I can work indoors now, in addition to my plein air painting. I have a great studio in Brewster; now I have no excuse not to paint when I go upstate either!

Studio Tour—-Getting ready to get ready to paint….

Posted by Jamie on February 5th, 2009

getting-ready-3-425

Sometimes I just can’t seem to get ready to paint. I use so many different mediums, and paint such diverse subjects, that my studio is forever littered with acrylics, gouache, watercolor palettes, sketchbooks lying around, canvases stacked up against the walls, still life objects lining the window ledges, and dirty water containers, not to mention all the things that end up in my studio that don’t even belong here!

getting-ready-1-425

I woke up this morning thinking about starting a large painting. When I got to my studio, I took out a 24×36″ canvas and put it on the easel. All the furniture is on wheels, so I started thinking about doing some “easy” rearranging. Hahaha! It never works out that way. I was putting things away and moving things around, and by the time that was done, it was way too late to start something big.

double-trouble-425

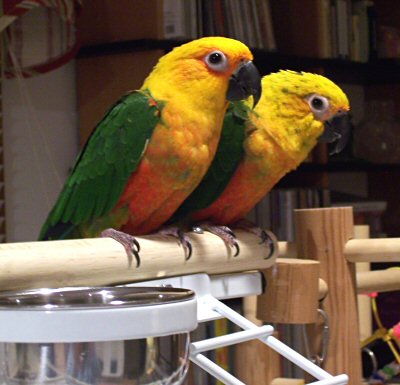
Here are my studio mascots, collectively known as Double Trouble!

lulu-lucy-1-425

Even Lulu and Lucy thought I was crazed. They were very curious about the changes in their surroundings, and wondered what Mom was up to.

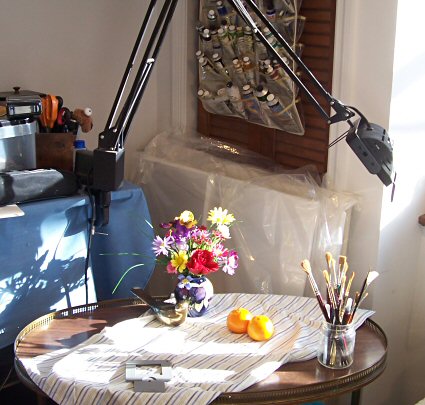
I figured I’d set up a still life and paint in watercolors instead, since I’d lost the morning already. Even that process seemed to go on forever today. Blue cloth or striped? Two clementines or a little blue and gold box? Brass bird or horse sculpture?

still-life-setup

I finally made my decision on the still life setup, but now we were already into the afternoon. The phone started ringing. My daughter came home from school. I have a meeting this evening and had to get dinner underway. The day was slipping away. It seemed the best choice was to take some more photos to share with my viewers.

getting-ready-2-425

The image above shows the area where I have my computer and do many of my small paintings. If I’m not working from life, I look at the images on the computer monitor instead of printing out photos. The color is so much better, and I can zoom in as needed and make color/value adjustments. Plus, it saves all that ink and paper!

paint-tubes-425

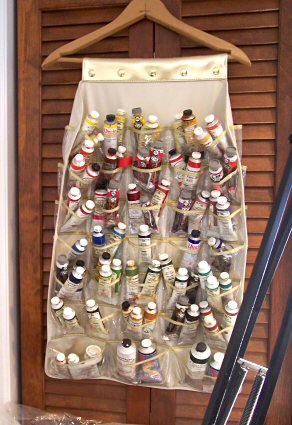
My sister gave me this hanging storage device. I think it was designed to hang in a closet and store jewelry, but it’s perfect for paint tubes. My most-used colors are in a box near the easel, so this holds mostly tubes of less-used oil paint colors that I need only on occasion, and keeps them easy to locate, yet out of the way.

spice-cabinet-425

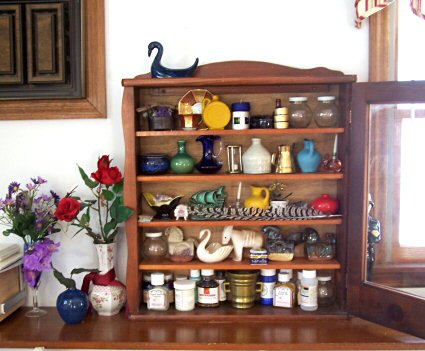
My brother-in-law built this beautiful spice cabinet. It has a glass door with a key lock. When he moved to California, he didn’t know what to do with it, so I promised to put it to good use. It serves as a display/storage cabinet for my small still life objects and some smaller jars of mediums and pigments.

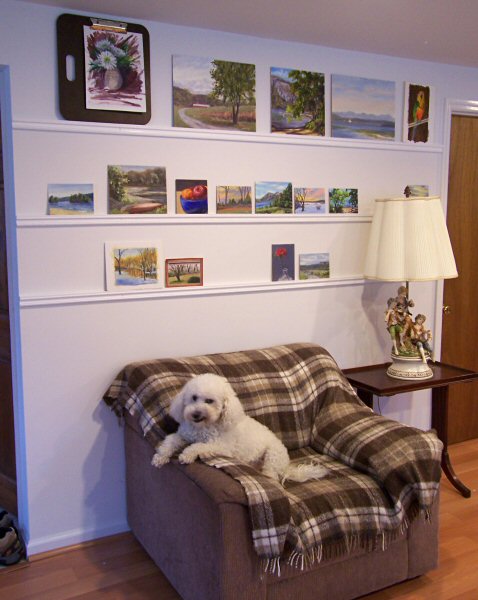
drying-rails-425

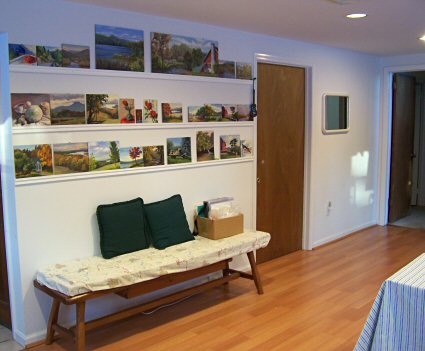
Some time ago, I made and installed these drying rails in my studio for my small paintings. They can hold paintings up to 16×20″ in size. I bought the molding at Home Depot, painted it, and secured it into the wall. If I were to do it again, I’d add a 1×1″ strip behind it to make the shelves a little deeper, and the paintings more secure. I use a dab of blu-tack on the backs of the paintings near the top to be sure they won’t topple over, since my rails are so narrow.

Tomorrow morning I will have that nice still life setup and my watercolors all set to go, plus a large canvas ready and waiting. At least I won’t have to clean again!

Edit:
Some viewers have emailed comments and questions.

Hi, Jamie,
Thank you for these wonderful pictures of your painting room. There
are wonderful ideas in them, and hopefully one day I can implement
one or two of them. Right now my studio is too crowded to even work!
It’s an extreme project.
You are inspiring and refreshing to see!
Regards,
Marilyn
PS I love your two birdies. It must be nice to have them and their
chatter in the creative process.

Marilyn, thank you for your comment. Have you ever heard that annoying sound that a crow makes? Well, imagine that fifty times louder. And imagine two of them. Then imagine it in an enclosed room with little sound absorption. That’s what Lulu and Lucy sound like when they get on a rant! They do make cute sounds too, like a gurgling sound when I give them peanuts, and a purring sound when they sit on my shoulder sometimes. They make kissing noises and say “Kiss?” when they want me to come over. So, for anybody who’s thinking they are so cute and they should run out and get some Jenday Conures, be sure your neighbors live far away, and that you have earplugs within reach!
Jamie

Thanks for sharing your studio.
I have a couple of otherwise decent universities that say I am a sculptor. Lately I have been working on my studio. Sculpture studios never look as nice as yours, ever.
Thanks again
dave

Dave, I knew there was a reason why I decided to be a painter! 😉 I have to say though, mine rarely looks this neat. That’s why I had to take the pictures—so that I can remember it was once this way!
Jamie

Jamie – Your studio looks great. I feel inspired. Right now I can’t walk in the room.
How long did it take you? Do you keep all the mediums in separate places?
Kay

Kay, it took a whole day. Yes, I do keep my mediums separate, and I keep my main colors separate from my extra colors, for the most part. I generally keep my main colors in a zip-lock bag, one for each medium. The bags are great because they take up the least amount of space, and I can just grab the bag labeled “main colors” when I’m on the run to go out painting. Extra oil paint tubes are stored on shelves in the garage, since they can endure cold temperatures easily.
Jamie

Cleaning the Studio

Posted by Jamie on January 23rd, 2009

I really did want to paint today, but here it is after 9pm and I am still tidying up in the studio. I work in so many different mediums and subjects that after awhile, this place becomes a confusing jumble of still life setups, photo references for landscapes strewn around, oils, acrylics and watercolors out on the tables, jugs of wash water and containers of mineral spirits, not to mention now-dry paintings which will get damaged if they’re not sorted and put somewhere safe.

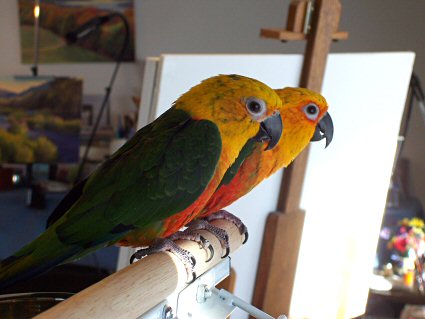
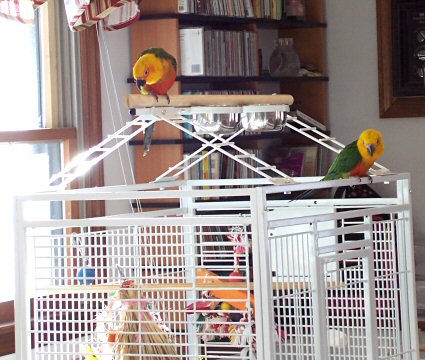
I guess it’s a day in the life of an artist, even if it’s not painting. However, for your entertainment value, I did take a quick photo tonight of my studio mascots, parrots Lulu and Lucy, as they supervised the process from the playtop of their cage. They are female Jenday Conures, and quite a handful! Although conures don’t usually talk, they both say “kiss” when they want a kiss, and also make kissing sounds. Too cute! Lulu also says “up” when she wants to be picked up.

090123-lulu-lucy-400

Hopefully there will be a painting to post tomorrow, with a clean studio to work in!

Yellow Roses in Pastel

Posted by Jamie on April 19th, 2008

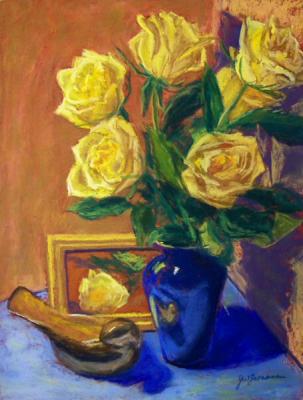
yellow-roses-pastel-done-600.jpg

12×9″, soft pastels on Art Spectrum sanded pastel paper
$325.00 plus $15 shipping and insurance within the Continental United States. For local sales, shipping charge will be allocated to NYS Sales Tax. Please email me at JamieWG@aol.com for International purchases or with any questions.

Everybody loves visiting an artist’s studio and seeing paintings come together, so I thought I’d share part of the process of this painting.

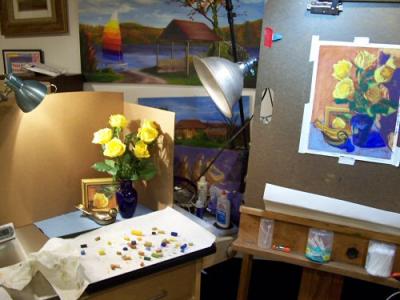
yellow-roses-pastel-setup1-500.jpg

Here’s a photo of my setup in my studio, along with the pastel in progress. The pastels on the paper towel are the ones I selected from my huge box of colors. Setting them aside like this makes them easier to find, and helps maintain a unified palette with good color harmony.

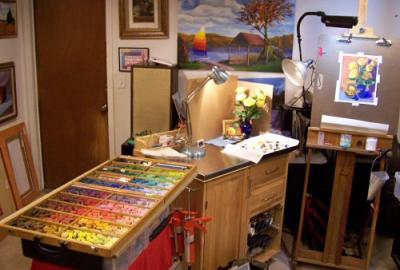
yellow-roses-pastel-setup2-500.jpg

Above is a photo of the full area of my studio where I was working on this piece, so you can see the whole pastel box. I think now you can see why I find it necessary to separate the colors I’m using in a particular work; otherwise I’d be forever looking to find them again!

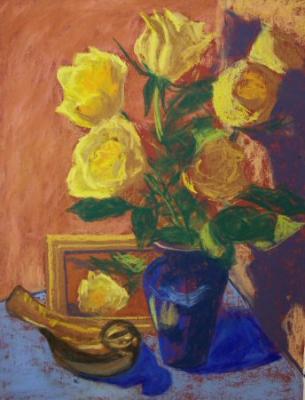
yellow-roses-pastel-wip1-450.jpg

This is an image of the painting about 1/3 of the way through the process. The basic color plan has been made and the objects blocked in. Following this stage, it’s time for refinement. Most of my time on a painting is spent in the refining stages.

I hope you’ve enjoyed this trip to my studio!

Drying/Display Rails installed in my studio!

Posted by Jamie on January 1st, 2008

drying-rails-b-500.jpg

For quite some time now, I’ve been trying to think of a practical way to store drying paintings and works in progress where I can see them. I find that as I look at them, I see areas I want to touch up or improve upon.

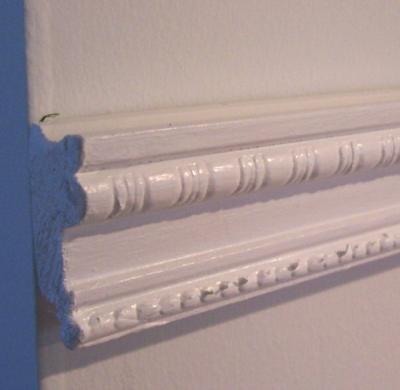
I put together ideas from a couple of people, and set out for Home Depot to see what I could find that would suit my needs. I was thinking I’d probably have to build some narrow, ledge-like shelves using two different types of wood molding. But then I found this great molding that does the whole trick! It comes out from the wall about 3/4″, and has a U-shaped groove on one side that the painting panel can set into. Because that groove is fairly shallow, it doesn’t block my view of the lower part of the painting. The front is a very nice, decorative pattern.

drying-rails-detail-b-600.jpg

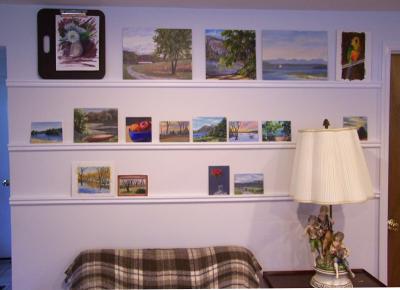
I cut the molding strips to the length of the wall, and primed and painted them with semi-gloss in a color to match the wall. I wanted them to blend in as much as possible. My dear husband helped me mount them. The top row allows for paintings up to 16 inches high (for standard 16x20s horizontally, or 16x12s vertically). The middle rail is set for paintings up to 12 inches tall. The lower rail will hold up to 10″ high works. Paintings larger than those would be on stretched canvas, and not displayed on the rails.

Here’s a straight on image:

drying-rails-800.jpg

I’m so excited! I think this is going to work out really well for my needs. I might do another wall too if I end up needing more space. I’d been hoping to have this done in time for my “studio tour” a couple of weeks ago (click here to see that post), but better late than never!

Welcome to My Studio! Come in for a tour…..

Posted by Jamie on December 18th, 2007

Click any image to enlarge.
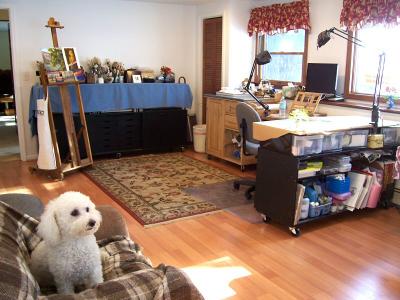
welcome-page-800.jpg

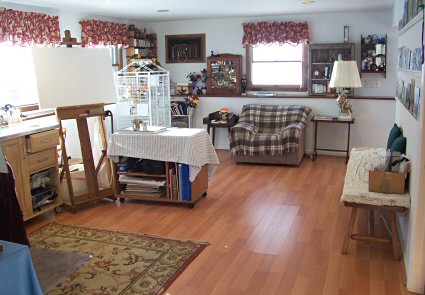
Welcome to my studio! Today I’m having a virtual studio tour for all of you who have wondered what my studio looks like. As many of you know, I am a plein air painter, so I only spend the coldest part of the year in here, and days with inclement weather. Still, I do many of my largest, smallest, and most important works here in the studio. It’s also a place where friends and buyers can come visit. So, come on in!

The photo above shows my main work area with my little furry mascot, Rondo. That’s Rondo’s favorite chair, though he is willing to share with visitors.

Below is a photo of what you see when you come in the door from the outside. I have three parrots in here, and two more upstairs. They give Rondo plenty of competition for attention. Since this is where I spend most of my time when I’m in the house, I really enjoy having the pets here with me.
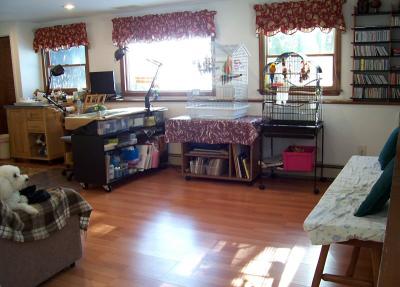
from-entrance-800.jpg

Cookie, the Sun Conure, is the sweetest bird in the house. She’s very camera shy though. She’s about 10 years old, so has passed the stage of adolescent antics!
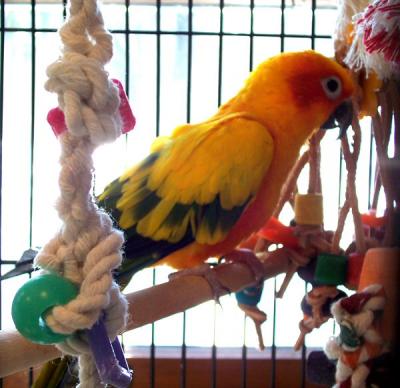
cookie-600.jpg

Lulu and Lucy, the Jenday Conures, are affectionately referred to collectively as Double Trouble. If there is a way to get into mischief, they will find it.
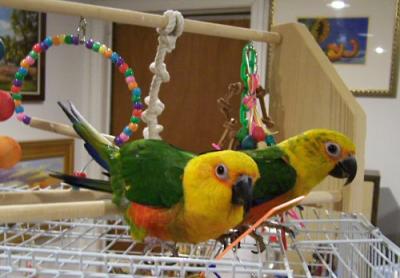
lulu-lucy3-500.jpg

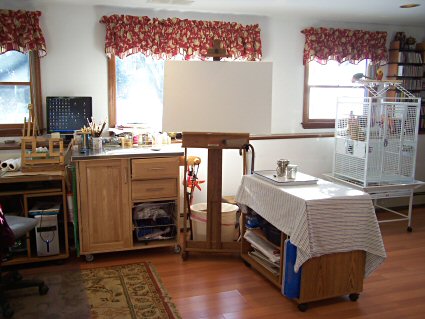
This is where I do 90% of my studio work. The large black cabinets hold most of what I need in the studio for oil and acrylic painting, and pastel work.
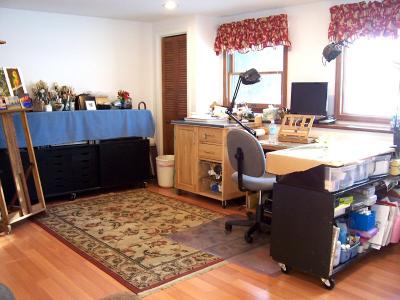
main-work-area-3-800.jpg

Artists always ask about these large, black cabinets. They have a long history and were built around 45 years ago for a completely different purpose. The drawers have fallen off the near cabinet. My husband helped me remove the legs and put wheels on both of them, so they are easy to move around the studio to reconfigure the space as needed.
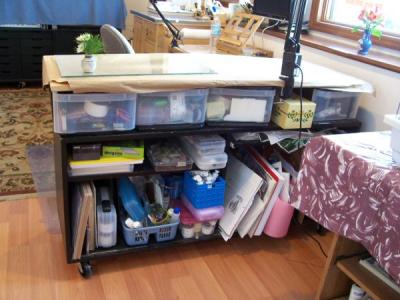
black-cabinet-1-600.jpg

Because I needed a higher work surface, I bought a bunch of plastic drawers at Staples and put them on top of the smaller black cabinet. Those drawers hold paint containers, palette cups, and assorted tapes and tools. Over that is a sheet of plywood, which is covered with brown craft paper. I take notes on the paper and spill paint all over it, then just replace it when there’s no more scribble room! I had a local glass place cut two, 16×24″ sheets of 1/4″ glass and grind the edges. Those serve as my palettes when working in the studio. You can see one of them on top of the cabinet above.
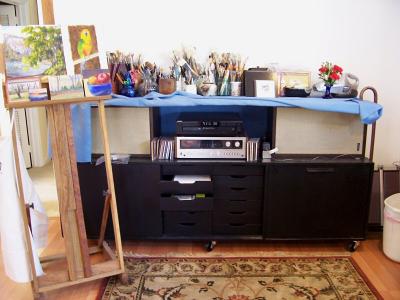
black-cabinet-2-under-800.jpg

The other black cabinet has music drawers that are now used for storing smaller paper, pads, labels and drawings. By lying my two large speakers on their sides, I was able to put a large piece of plywood across the top to form another high work surface. I keep my brushes, pens, scissors, and other assorted supplies that require easy access here. I keep it covered with the cloth because it’s a little unsightly!
main-work-area-2-800.jpg

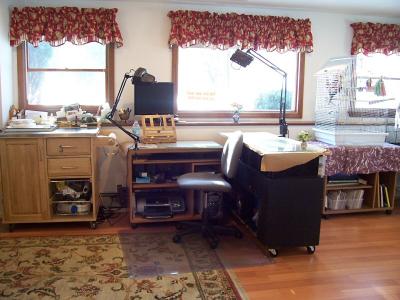
As you can see, I have a small easel just below my computer screen, and another glass palette there as well. If I have to work from a photo, I paint directly off the screen, rather than printing out an image. The color is always better from the monitor than from a print. When I need to work larger, I prefer to stand at the large easel that you see in some of the other photos here.

The lamp clamped onto my computer table also has a magnifier built into the top, which comes in very handy for my miniatures. The other lamp, clamped to the black cabinet on the right, is often used to light a still life on top of that cabinet, or for extra light on my work as needed. I have recessed ceiling lighting in the studio, and use flourescent floodlights in the high hats.
toward-bench-800.jpg

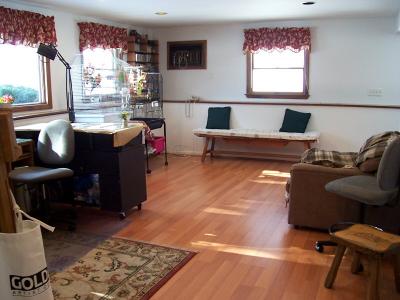
There is a long bench for extra seating over on the other side of the studio. I don’t have a crowd in here too often, and before a show, that bench gets cluttered with frames and paintings on their way out the door.

I do a lot of paintings from the windows in my house. There are nice views from nearly every room, so I can do “fake” plein air paintings even in cold and miserable weather! My studio presents some good window-painting opportunities looking out to the lake:

view-lake-800.jpg

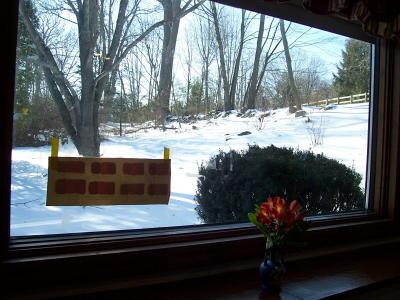
The view up the hill to the road is one I paint from time to time as well. In fact, I’ve painted this view twice in the past few weeks!
view-uphill-800.jpg

In case you’re wondering what’s taped to the window, that’s actually a lightfastness test, to see how quickly certain pigments will fade when exposed to direct sunlight. I’m testing alizarin crimson and some of the supposedly “lightfast/permanent” versions of alizarin, by many different paint manufacturers.

Artists often ask me how I can keep my studio space so tidy and organized. The truth is, my studio used to be an absolute mess. In the past six months, I’ve taken everything out of my studio that I possibly could, leaving the space here only for current work and what I need to do that. I no longer use my studio for storage of paintings, frames, or large paper and canvases. I’ve even taken the paintings off the walls in here to help keep my mind clear. Stored paintings are now in crates in an adjacent room and double-hung on walls. Most of my extra tubes of oil paints have gone to a large shelving unit in the adjacent garage. Frames and framing supplies are now taking up residence in the workshop instead of the studio. Colored pencils, watercolor pencils, and watercolors are upstairs in another little studio/den with my other two parrots. (I’ll have to do a separate tour of that one another day—there are some very interesting things up in that one, including my mini museum of artwork I’ve collected.) It’s not easy to keep this space clutter-free. Only by keeping what’s in here to the bare minimum have I been able to finally gain control over the chaos!

If you’re thinking of setting aside a room for a studio, I think the most important elements are:
1. Mobility of furniture. With everything on wheels, I can have a completely different studio setup in a matter of minutes. How often do I need to do that? A lot. If I have a model in, or work in pastels, or work on a very large painting, the setup is entirely different than what you’ve seen on this tour!

2. Don’t try to cram everything into your studio. Keep just what you need in there to do your work. Keep saying to yourself, “My studio is NOT a storage facility!”

3. Great light. You can’t paint without it.

4. Great music! It makes the world go round, and increases my patience tenfold when the going gets tough on a painting!

5. A spot for a still life setup and/or model. There’s nothing like working from life, whether out on location or in the studio. Photos are poor substitutes for the real thing.
toward-entrance-800.jpg

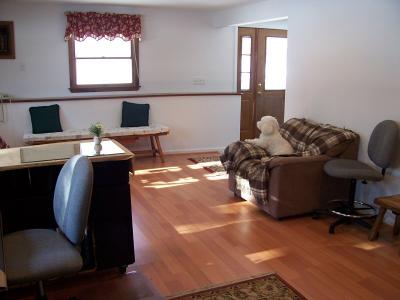
In case you thought you’d never be able to find your way out of here, the door’s right over there! Thanks so much for coming to visit my studio. I hope you enjoyed the tour! If you’re not too tired and want more, check out the Daily Painter’s site on 12/19/07, when many of the other Daily Painters will be hosting virtual studio tours!

I have to add one more photo to this post, because my friend Jeanne complained about the absence of her favorite birds, Mango and Coconut. So, especially for Jeanne, here are the little cuties of the flock:
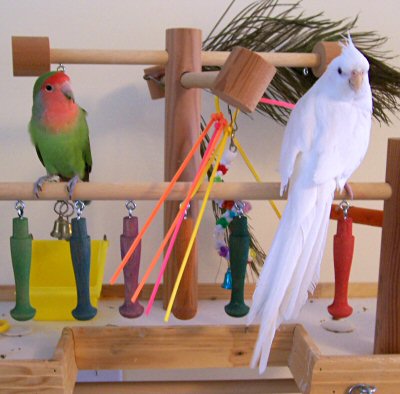
mango-coconut-400.jpg

I do bring them down here to the studio from time to time, but fearless Mango invariably flies over to the Conures, who probably wouldn’t think twice about biting his little feet off when he lands on their cage. Even with their wings clipped, birds can fly enough to get around the room. So, it’s for his own protection, and Coconut’s, that the smaller birdies live upstairs.

New floor today!

Posted by Jamie on November 19th, 2007

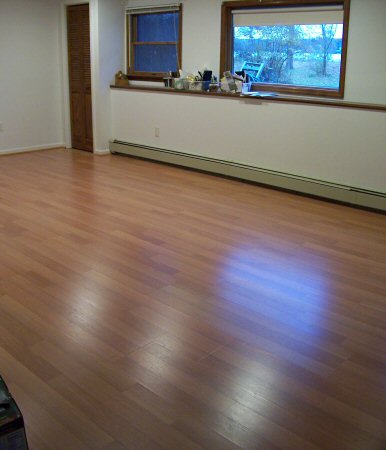
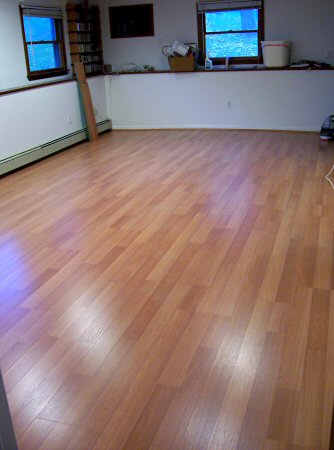
Today was the big day when they finally came to install the new wood laminate floor in my studio! I spent yesterday moving out all my art supplies and furniture. This morning, my parrots Lulu, Lucy, and Cookie were brought upstairs. They were not happy about the move! Fortunately, nearly everything in there is on wheels. There’s one huge cabinet that is not on wheels, but my dear husband is going to put them on tonight, so it’ll be easy to move it back in.

I love having everything in the studio so mobile. If I’m working on a larger painting, or have a model in, or just want a change of scene, I can have a new studio setup in minutes. Now that I’ll have the wood floor instead of carpeting, it will be even easier to rearrange at the slightest whim.

Needless to say, my computer in there is disconnected (I’m on hubby’s now), my camera software is inaccessible, and most of my art supplies are packed away in cabinets and drawers up against one another…. But the floor is done, and it looks fabulous!

new-floors-1-450.jpg

new-floors-2-450.jpg

I guess I’ll be moving furniture most of tomorrow and reorganizing.